Welcome to the T6 Pro Thermostat Installation Manual. This guide provides step-by-step instructions for installing and configuring your T6 Pro Programmable Thermostat. Designed for both professionals and homeowners, it ensures seamless integration with your HVAC system, offering smart home compatibility and energy-saving features. Follow the manual carefully to achieve optimal performance and comfort. Professional installation is recommended for complex systems. Use the Honeywell Home app for advanced configuration and control.
1.1 Overview of the T6 Pro Thermostat
The T6 Pro Thermostat is a programmable, smart home-compatible device designed for efficient temperature control. It supports various HVAC systems, including heat/cool configurations, and integrates seamlessly with the Honeywell Home app for remote management. Features include a sleek design, optional cover plate for aesthetics, and the innovative UWP Mounting System for easy installation. It ensures energy efficiency and precise temperature regulation, adapting to your comfort needs.
1.2 Importance of Professional Installation
Professional installation is highly recommended for the T6 Pro Thermostat, especially for complex HVAC systems. Trained technicians ensure proper wiring, configuration, and system compatibility, preventing potential issues like connectivity problems or inefficient performance. Improper installation can lead to safety hazards, reduced efficiency, or system damage. Always consult a certified HVAC professional for a seamless and safe setup.
Pre-Installation Requirements
Before installing the T6 Pro Thermostat, ensure you have all necessary tools and materials. Turn off your HVAC system and verify compatibility with your existing setup. Read the manual carefully to understand the process and safety guidelines. Proper preparation ensures a smooth and successful installation.
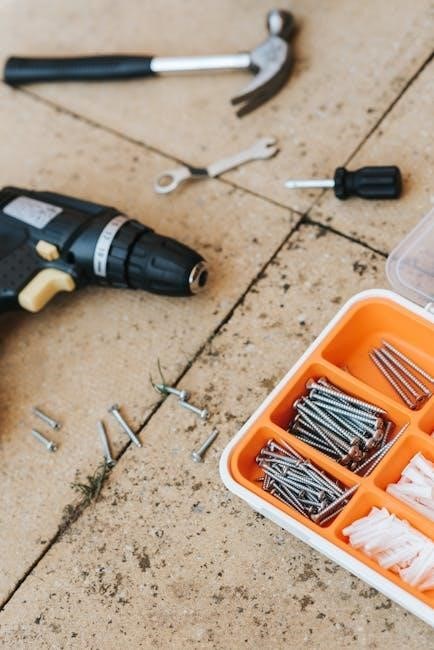
2.1 Tools and Materials Needed
To install the T6 Pro Thermostat, gather essential tools: a screwdriver, drill, level, wall anchors, and wires. Ensure you have the UWP mounting system, optional cover plate, and batteries. Additional materials like a pencil for marking and a stud finder may be useful. Having all items ready ensures a hassle-free installation process.
2.2 Safety Precautions
Before starting, turn off the HVAC system and verify the power is off. Handle wires carefully to avoid damage. Ensure the thermostat is installed away from direct sunlight, heat sources, and drafts. Maintain a minimum height of 1.2-1.5 meters from the floor. Follow all safety guidelines to prevent electrical hazards and ensure accurate temperature readings.
Understanding the UWP Mounting System
The UWP Mounting System is designed for secure and level installation of the T6 Pro Thermostat, ensuring proper alignment and wire management for optimal performance.
3.1 What is the UWP Mounting System?
The UWP Mounting System is a hardware component designed to securely mount the T6 Pro Thermostat on the wall. It includes brackets and leveling tools to ensure proper alignment and installation. This system is part of the Honeywell Standard Installation Adapter, providing a sturdy base for the thermostat and ensuring proper wire management for a clean and professional setup.
3.2 Preparing the UWP for Installation
Open the package and locate the UWP (Universal Wall Plate). Pull the door open to access the wiring hole. Ensure all components, including screws and anchors, are included. The UWP is part of the Honeywell Standard Installation Adapter, designed to fit standard electrical junction boxes. Prepare the system by aligning it with the wall and ensuring proper fitment before proceeding to drilling or securing.
3.3 Positioning and Leveling the UWP
Position the UWP on the wall, ensuring it is centered and aligned with the electrical junction box. Use a level tool to confirm the UWP is straight. Mark the hole positions accurately, typically at the top and bottom corners of the plate. Proper leveling ensures the thermostat operates correctly and maintains a professional appearance. Drill pilot holes carefully to avoid wall damage.
3.4 Drilling Holes and Securing the UWP
Drill pilot holes at the marked positions using a drill bit suitable for your wall type. Insert wall anchors if necessary for added stability. Align the UWP with the holes and secure it using the provided screws. Tighten firmly but avoid over-tightening to prevent damage. Ensure the UWP is flush against the wall for a professional finish and proper thermostat operation.
Optional Cover Plate Installation
The optional cover plate is used to mount the thermostat to an electrical junction box or cover paint gaps from previous installations. It ensures a neat appearance and proper fit, enhancing the overall installation aesthetics while maintaining functionality.
4.1 When to Use the Optional Cover Plate
Use the optional cover plate when mounting the T6 Pro to an electrical junction box or to cover paint gaps from the previous thermostat. It ensures a neat appearance and proper fit, enhancing installation aesthetics without compromising functionality. This accessory is ideal for maintaining a professional finish and hiding any unsightly marks left by older units.
4.2 Installing the Optional Cover Plate
To install the optional cover plate, first remove the thermostat from the UWP mounting system. Align the cover plate with the electrical junction box or desired wall area. Secure it using the provided screws, ensuring a flush fit. This step is optional but recommended for installations requiring a neater appearance or to cover gaps left by previous thermostats.
Wiring and Connections
Insert wires through the UWP mounting system, ensuring proper alignment with the thermostat terminals. Connect each wire securely to the corresponding terminal on the T6 Pro. Use the wire saver module if additional wires are needed for compatibility with your HVAC system. Follow the wiring diagram provided for accurate connections.
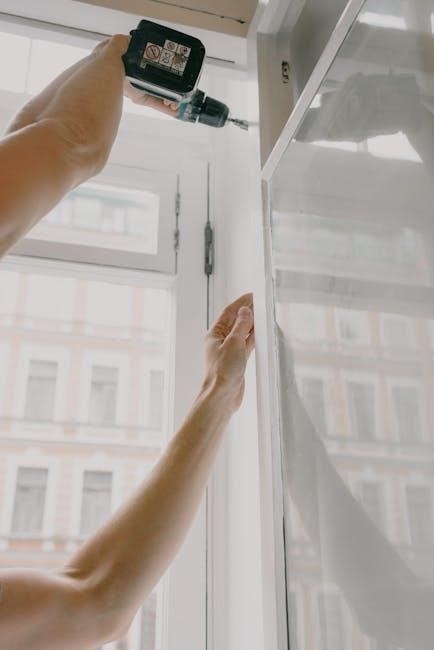
5.1 Inserting Wires Through the UWP
Pull the door open on the UWP and carefully feed the wires through the designated wiring hole. Ensure wires are properly seated and aligned to avoid tangling or damage. Once all wires are inserted, close the UWP door securely to maintain a clean installation. Refer to Figure 3 for visual guidance on this step.
5.2 Connecting the Wires to the Thermostat
Match the wires to their corresponding terminals on the thermostat, ensuring correct connections for heating, cooling, and power. Secure each wire firmly to avoid loose connections. If using the wire saver module, attach it to the thermostat and connect the wires as directed. Double-check all connections to ensure proper functionality and prevent system issues.
5.3 Using the Wire Saver Module
The wire saver module is essential for systems requiring a fifth wire. Install it by connecting the module to the thermostat and routing the wires through it. This ensures compatibility with older systems, allowing seamless communication between the thermostat and HVAC unit. Follow the module’s wiring diagram to avoid errors and ensure reliable operation;

Thermostat Powering and Configuration
After installing the thermostat, power it by connecting the wires to the appropriate terminals. Use the Honeywell Home app to configure settings like temperature ranges and schedules for optimal performance.
6.1 Powering the Thermostat
Power the T6 Pro Thermostat by connecting the appropriate wires to the designated terminals. Ensure all connections are secure to avoid power issues. If using a common wire, connect it to the ‘C’ terminal. For battery-powered models, insert two AA batteries following the polarity indicators. Always refer to the wiring diagram in the manual for accurate connections. Proper powering ensures reliable operation and prevents system malfunctions.
6.2 Configuring the Thermostat Settings
Configure the T6 Pro Thermostat settings using the Honeywell Home app or the thermostat interface. Set temperature ranges, schedules, and fan settings according to your preferences. Enable geofencing, smart alerts, and energy-saving modes for optimal performance. Use the app to customize settings remotely and ensure your system operates efficiently. Refer to the manual for detailed configuration options and advanced features.
Post-Installation Setup
After installation, test your heating and cooling system to ensure proper functionality. Set temperature set points for optimal comfort and energy efficiency, following the manual guidelines.
7.1 Testing the Heating and Cooling System
After installation, test the heating and cooling system to ensure proper functionality. Switch between heat and cool modes, verifying smooth transitions. Check for consistent temperatures and airflow. Use the Honeywell Home app to monitor performance and adjust settings as needed. Ensure all features, like scheduling, are functioning correctly for optimal comfort and efficiency.
7.2 Setting Temperature Set Points
Set temperature set points to regulate heating and cooling operations. Adjust the minimum and maximum temperature ranges for both heat and cool modes. Ensure the temperature differential is set correctly for optimal performance. Use the Installer setup menu or the Honeywell Home app to configure these settings. Refer to the manual for detailed guidance on temperature set point configuration.
Troubleshooting Tips
Identify common issues like connectivity problems or wiring faults. Check thermostat wiring and power sources. Reset the system if necessary. Refer to the Honeywell Home app for advanced troubleshooting.
8.1 Common Issues During Installation
Common issues during T6 Pro installation include wiring problems, power supply inconsistencies, and connectivity errors. Ensure all wires are securely connected and properly labeled. Verify thermostat power requirements and check for loose connections. If the display isn’t responsive, reset the thermostat or check battery levels. For connectivity issues, restart the Honeywell Home app and ensure stable Wi-Fi. Re-level the UWP if misalignment occurs.
8.2 Solving Connectivity Problems
To resolve connectivity issues with your T6 Pro Thermostat, ensure a stable internet connection and verify Wi-Fi network settings. Restart the Honeywell Home app and check for updates. If the thermostat isn’t detected, reset it by removing batteries or powering it off temporarily. Ensure the thermostat is properly paired with the app and confirm its online status. Consult the app’s troubleshooting section for additional guidance.
Using the Honeywell Home App
Download the Honeywell Home app to control your T6 Pro Thermostat remotely. Available on the App Store and Google Play, it offers features like scheduling, remote access, and system monitoring.
9.1 Downloading and Installing the App
To control your T6 Pro Thermostat, download the Honeywell Home app from the App Store or Google Play. Install it on your smartphone or tablet. Open the app and follow the in-app instructions to create an account and link your thermostat. This setup allows remote access, scheduling, and monitoring of your HVAC system for enhanced convenience and energy management.
9.2 Configuring the Thermostat via the App
Open the Honeywell Home app to configure your T6 Pro Thermostat. Navigate to the settings menu to adjust temperature set points, create schedules, and enable geofencing. Use the app to set energy-saving preferences and monitor energy usage. Ensure remote access is enabled for controlling the thermostat from anywhere. Customize settings to optimize comfort and efficiency based on your lifestyle and preferences.
Maintenance and Care
Regularly clean the thermostat screen and vents to ensure accurate temperature readings. Replace batteries annually or as needed. Avoid exposure to direct sunlight or extreme temperatures. Schedule professional maintenance annually for optimal performance.
10.1 Cleaning the Thermostat
Regularly clean the thermostat’s screen and vents to maintain accuracy. Use a soft, dry cloth to wipe away dust and debris. Avoid harsh chemicals or liquids, as they may damage the device. Ensure the thermostat is powered off before cleaning to prevent electrical issues. Cleaning helps prevent dust buildup and ensures proper temperature sensing and operation. Repeat this process every 2-3 months for optimal performance.
10.2 Replacing Batteries
To replace the batteries, power off the thermostat and open the battery compartment. Remove the old batteries and insert two new AA alkaline batteries, ensuring correct polarity. Close the compartment and turn the thermostat back on. Replace batteries every 12-24 months or when the low-battery indicator appears. This ensures continuous operation and accurate temperature control.

Congratulations on completing the T6 Pro Thermostat installation! This manual guided you through setup, configuration, and maintenance. Ensure all steps are followed for optimal performance. Enjoy your new thermostat!

11.1 Final Checks and Verification
After installation, perform a final system check. Ensure all wires are securely connected and the thermostat is properly mounted. Test heating, cooling, and fan modes to confirm functionality. Check temperature accuracy and verify app connectivity. Review all settings, including temperature set points and scheduling, for optimal performance. Address any issues promptly to ensure reliability and efficiency.
11.2 Ensuring Optimal Performance
Ensure your T6 Pro Thermostat performs optimally by following these guidelines. Regularly clean the thermostat to prevent dust buildup. Check and replace batteries as needed to maintain functionality. Use the Honeywell Home app to update firmware and configure settings for enhanced performance. Periodically review and adjust temperature set points to match your comfort preferences. Avoid placing the thermostat near direct sunlight or heat sources to ensure accurate temperature readings. By following these steps, you can enjoy consistent efficiency and comfort year-round.